Tire Maintenance & Safety
Best price guarantee
Tire replacement coverage
24/7 roadside assistance
Easy returns
Last updated 3/13/2025 - Originally published 3/13/2025
Written by SimpleTire, Expertly reviewed by Brett Antosh

Properly balanced tires are crucial for a smooth, safe, and comfortable ride. Unbalanced tires can lead to vibrations, uneven wear, and even damage to your vehicle's suspension components.
While professional tire balancing is recommended, it's possible to balance your tires at home with the right tools and techniques. Balancing your own tires can save you money and provide a sense of accomplishment as a DIY enthusiast.
In this article, we'll guide you through the essential tips and steps for balancing your tires at home. By following these guidelines, you can ensure your tires are properly balanced, leading to improved vehicle performance and a more enjoyable driving experience.
What is Tire Balancing at Home?
Tire balancing at home involves adjusting the weight distribution of a tire and wheel assembly to ensure smooth rotation and minimize vibrations while driving. The goal is to achieve an even distribution of weight around the entire circumference of the tire, which helps prevent uneven wear and improves overall vehicle stability.
Balancing tires at home requires a few essential tools, such as a bubble balancer or static balancer, and adhesive wheel weights. These tools allow you to identify imbalances in the tire and wheel assembly and make necessary adjustments by adding small weights to counteract any heavy spots.
While professional tire balancing equipment, like dynamic balancers, can provide more precise results, a bubble balancer is an affordable and effective solution for DIY tire balancing. By carefully following the proper techniques and using the right tools, you can achieve a well-balanced tire assembly that provides a smooth and comfortable ride—all from the convenience of your own garage.
Essential Tips for Tire Balancing at Home
Before diving into the tire balancing process, it's important to gather the necessary tools and create a safe working environment. Here are some essential tips to keep in mind:
- Invest in a quality bubble balancer: A reliable bubble balancer is the key to accurate tire balancing at home. Look for a sturdy, well-designed balancer that can accommodate various wheel sizes.
- Acquire a set of adhesive wheel weights: Adhesive wheel weights come in different sizes and materials, such as steel or zinc. Make sure to have a variety of weights on hand to fine-tune the balance of your tires.
- Find a flat, stable surface: Choose a level workspace, such as a garage floor or driveway, to ensure accurate balancing results. Avoid working on uneven or sloped surfaces.
- Prioritize safety: Always use wheel chocks to prevent the vehicle from rolling while you work on the tires. Wear protective gloves and eyewear to avoid injuries from debris or sharp edges.
1. Inspect Your Tires and Wheels
Before beginning the balancing process, thoroughly inspect your tires and wheels for any issues that may affect the balance or require attention:
- Examine the tire tread for uneven wear patterns, such as cupping or scalloping, which can indicate suspension or alignment problems. Address these issues before balancing the tires.
- Check for any visible damage to the tire sidewalls, such as bulges, cuts, or punctures. If you find significant damage, consider replacing the tire for safety reasons.
- Remove any debris lodged in the tire tread, such as small rocks or glass, as these can cause imbalances or damage the tire over time.
- Clean the wheel surface to ensure a proper fit for the adhesive wheel weights. Use a wire brush or sandpaper to remove any rust, dirt, or old adhesive residue.
2. Use a Bubble Balancer
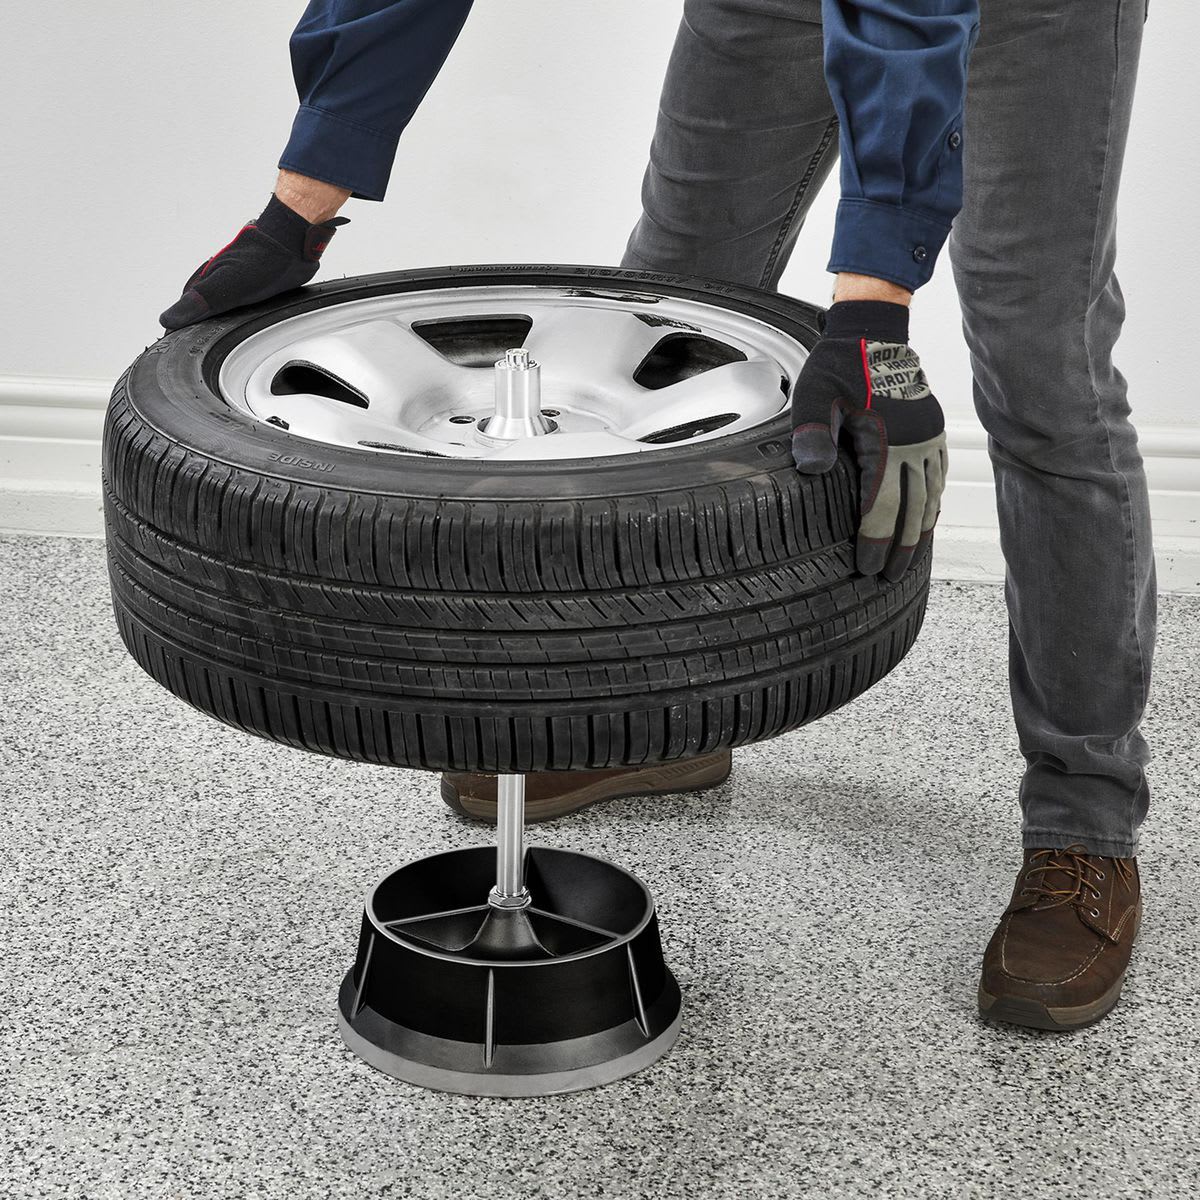
A bubble balancer is a simple yet effective tool for balancing tires at home. Follow these steps to properly use a bubble balancer:
- Place the tire and wheel assembly on the bubble balancer, ensuring that it sits securely on the center post.
- Give the tire a gentle spin and observe the position of the bubble in the balancer's sight glass. If the bubble rests in the center, the tire is balanced. If the bubble moves to one side, it indicates an imbalance.
- Rotate the tire until the bubble is at its highest point. This is the lightest spot on the tire and where you'll need to add weight to achieve balance.
- Experiment with different adhesive weight sizes and positions until the bubble remains centered when the tire is rotated. Start with smaller weights and gradually increase as needed.
- Once the bubble stays centered, spin the tire in both directions to confirm the balance. Make any final adjustments if necessary.
3. Add Wheel Weights
Adding wheel weights is the key to correcting imbalances in your tire and wheel assembly. Here's how to properly apply adhesive wheel weights:
- Choose the appropriate weight size based on the severity of the imbalance. It's better to start with smaller weights and add more as needed, rather than overcompensating and having to remove excess weight.
- Clean the area where you'll be applying the weight to ensure proper adhesion. Use a cleaner that won't damage the wheel finish, such as rubbing alcohol.
- Apply the adhesive weight to the inside of the wheel, directly opposite the lightest spot identified by the bubble balancer. Press the weight firmly to ensure it stays in place.
- Recheck the balance using the bubble balancer and make any necessary adjustments by adding or removing weights until the bubble remains centered.
4. Reinstall and Test Drive
Once you've achieved a balanced tire and wheel assembly, it's time to reinstall it on your vehicle and take a test drive to ensure a smooth ride:
- Carefully lift the balanced assembly and position it onto the wheel studs. Avoid disturbing the newly applied wheel weights.
- Hand-tighten the lug nuts in a star pattern, alternating between opposite sides to ensure even pressure.
- Lower the vehicle and use a torque wrench to tighten the lug nuts to the manufacturer's specified torque value. This crucial step ensures the wheel is securely fastened and won't come loose while driving.
- Take your vehicle for a test drive, starting at low speeds and gradually increasing to highway speeds. Pay attention to any vibrations or unusual sensations coming from the steering wheel or seat.
- If the ride feels smooth and vibration-free, congratulations! You've successfully balanced your tires at home. If you still notice vibrations, double-check your work and make any necessary adjustments.
By following these essential tips and steps, you can confidently balance your tires at home, saving money and ensuring a smoother, safer ride. Remember to prioritize safety, use the right tools, and take your time to achieve the best results. With practice and patience, you'll become a pro at DIY tire balancing, just like the experts at tire retailers like SimpleTire.
How to Balance Tires at Home: Frequently Asked Questions
1. What are the signs that my tires need balancing?
Recognizing when tires require balancing often involves noticing specific changes in your driving experience. One indicator is a persistent vibration felt in the steering wheel or throughout the vehicle, particularly as speed increases. This sensation suggests uneven weight distribution, leading to an unstable ride. Additionally, a visual examination of your tire tread might reveal irregular wear patterns. Such patterns, like scalloping, can indicate imbalances and should prompt immediate attention to maintain a smooth and safe driving experience.
2. Can I balance tires without a machine?
Balancing tires at home without specialized machinery is achievable with basic, accessible tools. A manual method involves using simple balancing aids, such as a homemade tire balancer, to assess weight distribution. By carefully adjusting and adding wheel weights based on the balance assessment, you can effectively manage tire balance at home. This approach not only offers convenience but also provides a practical solution for maintaining tires without significant investment in professional equipment.
3. How often should I balance my tires?
Regular tire balancing should be part of your vehicle maintenance routine. It's generally recommended to perform this task in conjunction with tire rotations, which typically occur every 5,000 to 6,000 miles. Staying attentive to your vehicle's performance and signs of imbalance between these intervals can also guide you to rebalance your tires when needed. Consistent balancing helps ensure a smooth driving experience and prolongs the life of your tires.
4. Do I need special tools to balance my tires myself?
Balancing tires at home requires a few key items to achieve optimal results. A balancing aid, such as a bubble balancer or other simple tools, is essential for evaluating tire equilibrium. Additionally, having a range of wheel weights on hand allows for precise adjustments. These tools provide an economical solution for maintaining your tires and ensure that you can address balance issues effectively without relying on professional services.
By following these essential tips and techniques, you can confidently balance your tires at home, ensuring a smoother ride and prolonging the life of your tires. Remember to prioritize safety, use the right tools, and take your time to achieve the best results. When you're ready to shop for new tires online, we invite you to explore our extensive selection and find the best deals at SimpleTire, where we're committed to making your tire-buying experience as simple and affordable as possible.
Ready to find the perfect tires?
Search By